Home-made Orange Marmalade

Make Orange Marmalade at home .JPG
Sunshiny, happy and sweet smelling, orange marmalade perks up my morning cuppa. I have loved marmalade for as long as I can remember, specially the candied peel in it that adds interesting texture to the hot, crisp toast. As I type, I am enjoying one 😀

It has been on my mind to make this beauty at home ever since I saw my friend Megha Vikaram Singh’s beautiful Kinnow marmalade, I knew I had an expert’s recipe to make it too.

I made some changes as I had very soft and sweet oranges and also the kids aren’t too keen on the bitter touch in marmalade. Here is my take on Meg’s Marmalade.

A step by step recipe of this three ingredient wonder.

1 kilo Oranges, ripe and sweet ones with orange peels
500 grams sugar
1 Tbsp lemon juice

Cut the oranges and the lemon into halves and juice them. Strain the juice through a thick sieve.
Marmalade Ingredients
Do not throw the seeds and the peels.
Scoop out the membranes, pips and pith (the white part inside the peel) from inside the orange halves as much as you can. I used the melon baller to do it. Tile all of this along with the seeds in a muslin cloth to make a small bag or potli.
Scooping the pith .JPG
Take 5-6 orange halves and cut them into thin strips using scissors or a very sharp knife.
Slicing the peel .JPG
Bring 3 cups of water to a rolling boil and add the peels. Boil for a minute and strain. Repeat this once. Drain the water and reserve the peel.
Boiling the peel .JPG
In a heavy bottomed pan add the juice and the small cloth bag/potli and bring to a boil. Keep boiling for 15 minutes. Remove the cloth bag.
Boling the juice with the pith and seeds.JPG
Ad the sugar and the peel and boil for another 15-20 minutes till the marmalade starts to thicken.
cooking the marmalade.JPG
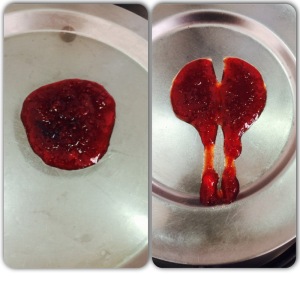
Keep a steel plate in the freezer before you begin cooking. To check doneness, put a tbsp of the marmalade on the chilled plate and run a finger in the middle. If the two halves stay apart, it is done.
Checking doneness.JPG
If it is too runny, cook for some more time. Be careful not to overcook as it thickens on cooling.
Marmalade done'.JPG
Keep 2-3 small bottles sterilized and ready. When the marmalade cools down a little (but is still warm) spoon it into clean jam bottles and seal. I store it in the refrigerator.

*The potli/cloth bag contains the pectin. The various recipes I looked at, say it stays well on the shelf for 5-6 months if the jars are sterilised well and completely dry. But considering the Mumbai weather and the fact that we add no preservative, I always pack my jams and spreads in small bottles and store them in the fridge always and they stay good for months.

IMG_9724.JPG
Look at that!!

Home made Orange Marmalade

Cheers and Happy Jamming!
Love
Garima


Harissa Paste and Harissa Yogurt Dipping Sauce

Harissa21
Harissa is another sauce I knew nothing about till recently just like the Tzatziki. And just like the Tzatziki, reading up made me think of a chutney which is a staple in Rajasthani households –  ‘Lehsun/Garlic ki chutney’!
The same method  i.e. soaking of chillies and grinding with garlic and spices- quite a few of them that I use in my kitchen on a daily basis like the coriander and the cumin. The pungent taste and the versatility.The only difference being that lehsun ki chutney is cooked in oil and Harissa is stored under a layer of oil.

 The Kitchn says ‘This Tunisian chile sauce is a fantastic shortcut to spice up a meal and can be used with everything from meat to vegetables, couscous, roasted potatoes, scrambled eggs, as a dip for bread … the list is truly endless’

Any kind of chillies may be used. For a less pungent paste, add some charred red peppers along with chillies.
I made it with Byadgi chilli and it came out nice and just the right level of pungent.
A combination of red peppers and chilli peppers may also be used.
Harissa 3

10-12 red chillies soaked in boiling hot water for 30 mins
10 cloves of garlic
1 tsp cumin
½ tsp caraway
1 Tbsp coriander seeds
salt to taste
1 large tomato
1 tbsp olive oil plus more to cover if storing
1 tsp lemon juice
Remove the stems of the chillies   and soak for 30 mins in hot water. Store the water and use in case needed while blending the paste.
IMG_5559
Remove the seeds.
Dry roast the caraway, coriander and cumin. Let cool.
IMG_5560
In a food processor add the chillies, garlic, tomato, salt, the roasted spices, lemon juice and grind to a thick, coarse paste adding EVOO slowly.
IMG_5562
IMG_5563
Store covered with a thin layer of olive oil.
Harissa with nama
The paste stays good for a month in the refrigerator.
Keep adding some olive oil as you scoop the paste off the top.

To make a dipping sauce, stir a couple of spoons of the paste into a cup of thick yogurt.
Serve with chips,crackers or like I did, with Sambousek!
IMG_5865

Recipe sourced and adapted from The Kitchn.

Tzatziki- A Cucumber Garlic Yogurt Sauce from Greece

IMG_5858I confess, the name Tzatziki (Pronounced tsa-tsi-ki) kind of stumped me (To add to the fun it is called ‘cha-chi-ki’ in Greek! ). I am not sure I would have ventured giving it a go had I not been on a Middle Eastern mission this month. But when I looked at the recipe, it was simplicity itself!
Reminiscent of our very own summer favourite ‘Kheere ka Raita’ this sauce comes together in a jiffy. Use it for sandwiches, wraps, rolls or dunk your chips in!
IMG_5842

All we need to watch out for is getting rid of all the excess water from the cucumber and we are good to go.
For about a cup of Tzatziki you need
IMG_5824
¾ cup very thick yogurt/curd/dahi (Hang about 2 cups of regular yogurt in a muslin cloth for a couple of hours to get the thick and creamy Greek style yogurt)
2 small cucumbers, peeled and cubed
3 cloves of garlic
¾ tsp salt
1 Tsp of lemon (add more as per taste)
8-10 fresh mint leaves, washed and torn

Sprinkle the cubed cucumber with salt and sit it in the colander covered with a plate with something heavy on the top so that the excess water drains. Alternatively, remove the seeds from the cucumbers and then dice them. The seeds contain water and can make the sauce watery.
Pat dry the cucumber with a towel and throw it into the food processor with garlic, lemon juice and the mint leaves.
Grind into a coarse paste.
IMG_5718
Stir into the yogurt and mix well.
Check and add more salt or lemon juice if needed.
IMG_5896
Serve with chips, crackers or Lavash (Find recipe here)
Store refrigerated in an air tight container.
It stays good in the refrigerator for 3-4 days.

Recipe sourced from Greek.Food.Com

Red or Green Pepper Hummus

It’s a very chip and dip kinda weather. A regular meal doesn’t seem to appeal but a snacky affair makes the palate sing! So here is a lighter and fresher version of hummus, loaded with peppers (red or green whichever you want to make it with! ) Fill it into Pita sandwiches, or simply use a sandwich spread or use it to dunk your nachos in, hummus is a healthy treat for the taste buds.

IMG_5153

IMG_5005
IMG_20141104_225409_wm

For the Green Pepper Hummus
(Or Red Pepper Hummus)

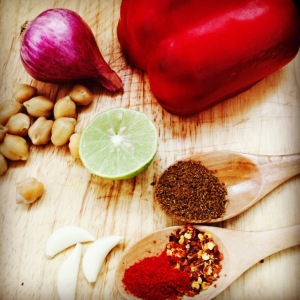
A medium size red or green pepper
1 red chilli
1 cup chick peas/kabuli chane, pressure cooked till cooked tender (save the water used to boil the chick peas)
1 small onion
2 Tbsp Lemon juice
Salt, to taste
2 cloves of garlic, coarsely pounded
1 tsp toasted cumin powder
½ tsp coriander powder
Water left over from boiling the chick peas
1 Tbsp pomegranate molasses (Find the recipe here)
1 Tsp Olive oil
½ tsp black pepper

Roast the pepper and chilli over an open flame till it is charred all over. Alternatively, char them under a hot grill.
Peel and cube the pepper and chop the chilli.
IMG_4083
Heat the olive oil in a small pan and fry the onions till tender. Add the cumin and coriander powders and take off the heat. Let cool.
Add the chilli and pepper along with the  chilli and pepper and all the other ingredients listed above.
IMG_4084
Blend till you get coarse, grainy paste adding water (saved from boiling the chick peas) slowly as required. Do not add all the water at once!
IMG_4088
Drizzle some olive oil.
IMG_4087
Garnish with paprika or some cumin powder.
IMG_4107
Serve with pita fingers, or Vegetable Crudités (carrot fingers, cucumber slices, paneer fingers, asparagus spears, sliced apple, pepper strips etc)

Recipe source- BBC Food Recipes

Baba Ghanoush and Mutabal- Middle Eastern Dips with Smokey Aubergines

BG1
My Gran makes her special special ‘bina chaaunk ka baingan bharta’ where she roasts the aubergines, peels and mashes them but does not further cook or temper them as is usually done in case of ‘Baingan ka Bharta’. She simply adds fine chopped tomatoes, onions, green chillies and fresh coriander along with some spices and serves it with a generous squeeze of lime. When I read up the recipes for Baba Ghanoush/Ghanouj, it reminded me of Naani style baingan bharta. And I got to say they are close,almost identical in fact!
I am amazed at the way food finds echoes across boundaries.
I made Baba Ghanoush with the green aubergines rather than the dark ones as they are slightly sweeter and milder than the other ones.

You need
1 medium Aubergine/brinjal , dark or green any will do
1 Tbsp Pomegranate molasses
2 Tbsp chopped walnuts
A clove of garlic
½ tsp salt (or to taste)
1 small tomato
2 Tbsp parsley, chopped (can use fresh coriander if parsley not available)
A few drops of white vinegar or a dash of lime  (Can skip if tomato is tart)

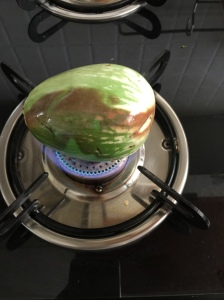
Roast the aubergine over the stove till the skin is completely charred.


IMG_4860
IMG_4863Alternatively slice into two and char it under a hot grill. Peel, remove the seeds and mash it once it cools down a little.
Leave it in a colander for about 15 minutes so that the excess liquid drains off. This will ensure a thick and creamy dip rather than a watery one.

Blend the aubergine mash and all the other ingredients in the food processor till you get a coarse paste.
IMG_4888
Drizzle with some olive oil. Garnish with some parsley, olives and a tomato rose.
BG
Serve cold with warm pita bread wedges, nachos and crackers.
IMG_5005

Mutabal is another dip which is made with smoked aubergine and the method to prepare it is similar to Baba Ghanoush
The ingredients for Mutabal are

1 medium Aubergine
1 Tbsp Tahini (find recipe here)
1 Tbsp Yogurt
2-3 cloves of garlic
Salt to taste
1 Tbsp Olive Oil

Blend the aubergine mash and all the other ingredients, apart from olive oil, in the food processor till you get a coarse paste.
Drizzle with some olive oil.

Recipe sources- Mama’s Lebanese Kitchen and Syrian Foodie in London.

Muhammara – a Red Pepper and Walnut Dip

Muhm

Muhammara, pronounced as moo-hum-mara, is a rich flavoured dip made with walnuts and roasted red pepper. It has a beautiful earthy flavour with a hint of sweetness from the pomegranate molasses and a hit of heat from the paparika and the red chilli powder that go into it. The name actually comes from the red colour of the dip. Muhammara translates to ‘red/reddened’
1m
2M
Muhammara, along with hummus and Baba Ghanoush, is essentially a part of the Middle Eastern/Mediterranean Mezze platter. It is delicious as a sandwich spread too! And an excellent way to feed walnuts to the oh- so-fussy teenagers and kids 😀
IMG_5030
You need
A large red pepper/red capsicum, charred on an open flame (alternatively char it under a hot grill)
½ cup of walnuts, chopped coarse
1 small green chilli, chopped fine
A very small onion
2 cloves of garlic
1 Tbsp Pomegranate Molasses (can use 2 Tbsp pomegranate juice and ½ tsp sugar instead, but the molasses really add to the depth of the flavour)
2 Tbsp toasted bread crumbs (Toast the bread slices, cool and run them in the blender)
1 Tbsp lemon juice
1 tsp cumin
½ tsp paparika
½ tsp red chilli powder
½ tsp salt (add more if needed)
1 Tbsp olive oil
3m
Char the red pepper over an open flame or grill till the peel has black spots.
Peel and cube.
Put all the ingredients into the mixer and blend into a paste. It should not be too fine. A somewhat grainy consistency is what we are looking at. Check and adjust salt or sweetness if needed.
4M

5M
Serve with nachos, chips, pita fingers or falafels,decorated a sprig of parsley and a tomato or radish rose.
IMG_5016

Recipe adapted from Mama’s Lebanese Kitchen with minor changes. An excellent blog for Lebanese/ Middle Easter  delights.
IMG_5018

Chunky Strawberry Jam

10996680_10153005937498563_4091470656460633148_n10991101_10153005937558563_8166684034223976927_n

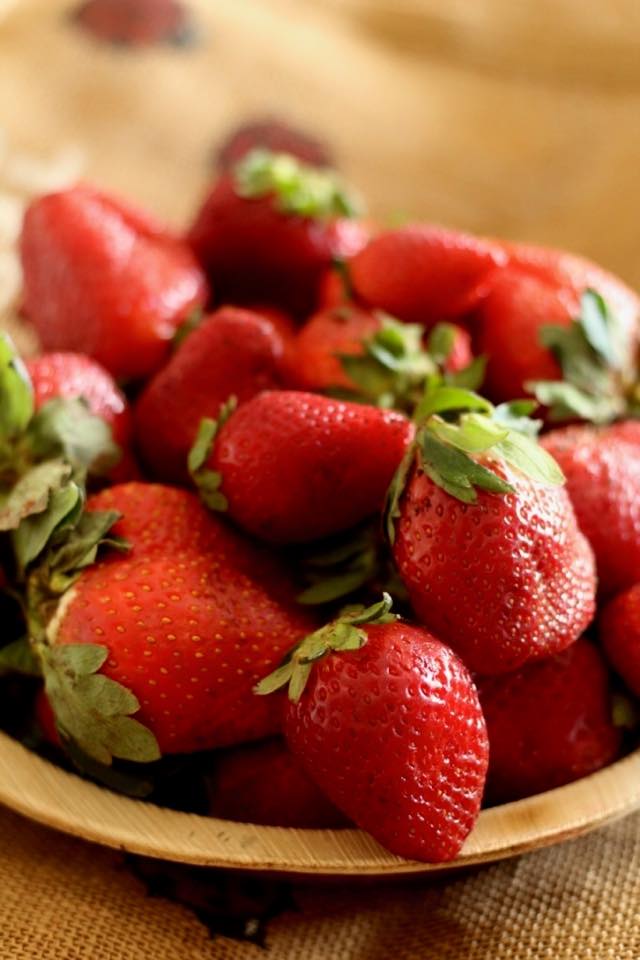
Strawberries! They are surely one of the most beautiful fruits to photograph. Bright red, glistening and so so pretty! I just cannot stop clicking them.
IMG_4436

As pretty as they look, they are a tad tart for my taste. My little one gobbles them by the dozens though, and the tartness doesn’t seem to bother him at all. I love the flavour and juiciness of them and when I saw this Very Yummy Strawberry Jam on Aparna’s blog, I just had to make it. I have never made jam before and the idea of this no preservative preserve, where I could control the sugar and retain the chunkiness of the fruit, really excited me. Of course it cannot be stored on the shelf all year long but, it is beautiful and flowy, unlike the oversweet clumpy store bought jams. Thanks Aparna for this recipe and for getting me hooked to jam making!
10998394_10153005937663563_6609675022953996371_n

I followed Aparna’s recipe with some minor changes and additions.
Here goes

1 + ½ kilo of Strawberries, hulled and chopped into small cubes
1 ½ cup of granulated sugar ( Add more as per taste and tartness of the berries)
1 vanilla bean (I had just that one, the recipe calls for three)
1 tsp vanilla extract (skip it in case you have enough vanilla beans)
Lemon rind from 2 large lemons
Juice from 2 large lemons
1 large apple, grated with the peel
3/4 tsp salt
2 glass jars sterilized (I got the water to a rolling boil and then put the bottles in. Boiled for 5 minutes and turned the heat off. I then dropped the lids in. I used Kissan jam bottles)

Wash about a kilo of strawberries and slice the top bits off (hull them). You should have five cups of chopped berries. Save the remaining berries to be used later.

FullSizeRender (1)
In a deep vessel add 5 cups of chopped strawberries and add a cup of sugar.
FullSizeRender (2)
Slice and scrape the vanilla beans to get the granules out and drop it all in, the granules and the whole bean.
FullSizeRender (3)
Mix very well till the sugar starts to dissolve.
unnamed (1)
Cover and leave in the refrigerator overnight / 7-8 hours.
The sugar will draw all the juices from the berries and they will be floating in the sweet syrup. This process ensures that the flavour from the berries is released into the jam.
unnamed (3)
In a heavy bottomed pan, take this sugar berry mixture and add the lemon rind, lemon juice, grated apple,salt and half a cup of sugar. Hull the remaining half kilo of berries and make a coarse puree in the grinder. Add to the mixture. More sugar can be added here, if desired.
unnamed (4)
Bring the mixture to a boil and cook on high flame for ten minutes, stirring in between.
unnamed (2)

IMG_1380

Put a steel plate in the freezer. We will use this to check if the jam is done (plate test)
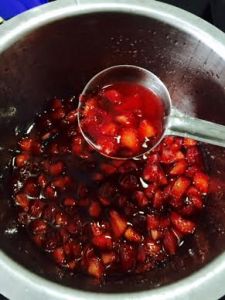
Lower the flame and cook till the berries are cooked through. You can mash the fruit if you want depending on how you want your jam to be. I like mine nice and chunky so I didn’t mash at all. The jam will thicken and begin to look glossy. It took me about 30 minutes of cooking.
FullSizeRender (4)
To check doneness, drop a tsp of jam on the chilled steel plate. If the jam leaves water and is runny, we need to cook it some more.

IMG_1426
If the jam stays together and leaves no water, it is done. Run a finger through the blob of jam and the lines would keep their place. Done!

IMG_1427
Add a tsp of vanilla extract in case you have no beans. Remove the large pieces of the vanilla bean.
Pour into the glass jars. Cover and leave.
Next morning, transfer to the refrigerator.
This will stay good in the refrigerator for up to two months.
This is one of the most flavourous, fresh and delectable jam I have ever had! I am never buying again 😀
11001883_10153005937848563_2251202891912022227_n

Hummus-the popular and healthy Middle Eastern Dip


IMG_20141104_225542_wm

Chick peas, deep flavoured garlic, zingy lemon, nutty sesame and earthy olive oil-  what’s not to love! Hummus is a tangy and super tasty dip from the Middle East. It is made with boiled chick peas and gets a lovely nutty flavour from the toasted sesame seeds that go into it. Team it with crackers as a yummy dip or make delectable sandwiches with home-made pita pockets, it is a treat! And it is so easy to make. Make a big batch and keep it in the refrigerator for up to a fortnight. Moreover, this delicious dip is said to have numerous health benefits. And though the taste is already a charmer, The Huffington Post gives us 10 healthy reasons to eat Hummus!

IMG_20141104_225732_wm


Let’s make Hummus with this easy-to-follow pictorial

Start with making ‘Tahini’

Toast 3 Tbsp of hulled sesame seeds/safed til till it changes colour slightly.
Cool and grind with 1 tbsp Olive oil (add a few spoons more if needed).

IMG_20141105_084544_wm


IMG_20141105_084624_wm


IMG_20141105_084659_wm


IMG_20141105_084736_wm

Tahini ready!!

And now to Hummus!  You need

1 cup chick peas/kabuli chane, pressure cooked till cooked tender (save the water used to boil the chick peas)
All the tahini prepared
2 Tbsp Lemon juice
Salt, to taste
4-5 Tbsp Extra virgin Olive Oil (add more if needed)
3-4 cloves of galic, coarsely pounded
1 tsp toasted cumin powder
Water left over from boiling the chick peas

To garnish
Paparika/chilli flakes/kashmiri lal mirch
Roasted cumin powder (bhuna jeera powder)
1-2 Tbsp Olive Oil

Add the boiled chick peas and Tahini to the mixer and grind.

IMG_20141105_084800_wm
Add garlic, lemon juice, salt, cumin powder, olive oil and grind.
IMG_20141105_084335_wm
Add water  slowly as required to get a smooth paste. Adjust salt and lemon juice to taste.
Serve topped with paprika, cumin powder and a liberal glug of olive oil. You could add some toasted sesame seeds too!
IMG_20141104_234339_wm
Stuff into Pita bread and make crunchy sandwiched with falafel and salad or pair it as a dip with a snack- it’s a winner!

IMG_20141104_225700_wm
I have adapted the recipe from here at The Daring Gourmet. 

IMG_0129_wm


Mama Dallou’ah- a Lebanese Beet Dip

Beet and I were never friends. Each time I tried sneaking it into meals at home, the guilty dish went untouched. Till today!

A big shout of thanks to my buddy Nikhil M Vasuki for sharing this recipe. Nik once told me the beet is a friendly fella and finally I agree. Here is his recipe in his words and my execution of it.

IMG_20140813_201543_wm

Presenting “Mama Dallou’ah”. This delightful dish is a beet dip popular in Lebanon, and is very simple to prepare.
IMG_20140813_202147_wm

For the tahini:

Roast ¼ cup sesame seeds until you achieve a light brown color. Once cooled, toss it in a blender, add two tablespoons of olive oil, two-three teaspoons of lemon juice, a clove of garlic, and a pinch of salt. Puree on medium and your tahini is ready.
20140813_184614_wm

20140813_184832_wm

For the Mama Dallou’ah:

Roast a large beet cut into cubes at 180°C in an oven for about 45 minutes or until tender.

IMG_20140813_202054_wm

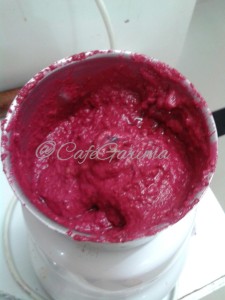
Once cooled, add it to the tahini, toss in two-three cloves of garlic, two-three more teaspoons of lemon juice, and one teaspoon of salt. Puree on medium, gradually adding a little water during the process until you achieve the desired consistency. Mama Dallou’ah is ready.
20140813_185646_wm

This tastes great at room temperature with pita bread or crispy garlic toast.
IMG_20140813_201633_wm.Credit for this recipe goes to Chef Joumana Accad of tasteofbeirut.com who in turn learned this from Kameel Abu-Hatoum of Baakline, up in the Chouf mountains.

I thank you Nik for bringing it to us, all the way from the Chouf mountains 😀


Fresh Basil Pesto

Pesto Sauce
Pesto makes an excellent base for a fresh pasta salad and is great even as dip. I also use it to make pesto pull apart rolls. It is really simple to make and can easily be frozen (minus the cheese).

I often make it with basil and sometimes with basil and avocado. In fact it is a flexible dip and can be made with any fresh herb and with nuts other than the traditionally used pine nuts! As per Farmer’s Almanac (the source of this recipe) ‘If you love pesto all year long, being confined to just basil can be a bit limiting. Luckily, there are many ways to make this delicious green sauce more versatile’. So I make mine with basil and pine nuts, basil,avocado and walnuts and most often with some cashew nuts thrown in. They make the sauce nice and creamy and give it a lovely flavour. Though the recipe does not call for it, I add some water, a tablespoon at a time, to get the consistency I like.

Ingredients
(Yields 1 cup Pesto)

1 cup packed basil, cilantro, or parsley
1/3 cup toasted pine nuts( I often use walnuts/cashew nuts/almonds or a mix of these)
1/2 cup grated Parmesan cheese (I mostly use cheddar/Amul cheese)
2 cloves crushed garlic
1/2 tablespoon lemon juice
2 Tbsp-1/4  cup olive oil
1/4 tsp salt

Put all the ingredients in the mixer-grinder/food processor and grind to get a somewhat smooth paste. Add a little water if the sauce is too thick. I almost always do.
Pesto Prep

Mix with pasta and veggies to get a quick salad. Use as a sandwich spread or as a dip. I often use it to make these pesto pull apart rolls. (Find the recipe for pull-apart rolls here)
Pesto Pull Apart rolls

To freeze, skip the cheese and freeze in ice trays. Transfer to a zip lock bag once frozen. To use, defrost and mix in some grated cheese.