Welcome to Jaipuriya!

The story of Jaipuriya began in Jaipur….

Somewhere in the pages of my growing up years, the hand-block prints of Jaipur got deeply imprinted on my psyche. I fell totally and helplessly in love. The love affair continues till date!

It found expression in the form of a new creative venture- Jaipuriya.com, my baby number two after CaféGarima!

IMG_0587

Jaipuriya, in the colloquial, applies to someone or something that is quintessentially from Jaipur. I am a ‘pukka Jaipuriya’ and when I was thinking of what to name the new start-up the name popped in my mind and stayed. Nothing could make it go away. And then for the logo- the hue had to be blue. My favourite colour and the most loved hue in the block print story- Indigo! The tree of life, to me, signifies creation as a constant and became the basis of the logo.

Jaipuriya Logo

So we launched in April with some basic simple silhouettes. We mostly had straight and A-line Kurtas in hand-block printed Indigoes, Kalamkaris and some soft pastel hues. We also had some goodies designed in sensuous rustling rayon. There were round necks and mandarin collars. We were totally overwhelmed by the response we got! These were instant sell-outs!  Thanks to all the lovely people ❤
IMG_6610
So the designing process at Jaipuriya begins with the selection of the designs we want to get printed. Yeah! We get our own fabric printed, fun, ain’t it! But then that’s the fun of belonging to Jaipur. One knows every nook and cranny (well almost!).
And then the sampling and designing happens.  Pamposh Sarolia, our Creative Head  (Ma, to me) has a deep aesthetic sense and an inherent sense of style, backed with ten solid years of running a leather and apparel studio of her own. I pulled her out of work hibernation and she designs all the traditional wear. The Indo-Westerns are mostly designed by yours truly.

What can be better than the fact that work is fun and takes you to beautiful hidden alleys to gorgeous treasures? I have to say I love my work!

A beautiful lady summed it up saying

कोई कह दे उनसे जाकर,
कि जयपुरिया के कुर्ते पहनकर
छत पे ना जाया करे..🌙
शहर में बेवजह,
ईद की तारीख बदल जाती है..!!
Best Compliment Ever! ❤

Check it all out at Jaipuriya.com!


Jaipuriya: A new beginning,my new baby as CaféGarima turns 2!!

CaféGarima is two!!
Happy birthday little one ❤ It has been a beautiful journey of learning, growth and many new friendships I’ll cherish lifelong . We have a brand new look and a swanky shiny new logo!

Huge thanks to Pri and Souvik of Giggling Creations for creating this beauty.. It defines CaféGarima. Thanks my dears! Love you both.

IMG_6612.JPG

It is also an apt occasion to introduce you to my baby number two- Jaipuriya.com!

Somewhere in the pages of my growing up years, the hand-block prints of Jaipur got deeply imprinted on my psyche. I fell totally and helplessly in love. The love affair continues till date! It found expression in the form of a new creative venture, my very own ‘Jaipuriya’.
IMG_0587

Jaipuriya, in the colloquial, applies to someone or something that is quintessentially from Jaipur. I am a ‘pukka Jaipuriya’ and when I was thinking of what to name the new start-up the name popped in my mind and stayed. Nothing could make it go away. And then for the logo- the hue had to be blue. My favourite colour and the most loved hue in the block print story- Indigo! The tree of life, to me, signifies creation as a constant and became the basis of the logo.

Jaipuriya Logo.png

So we launched in April with some basic simple silhouettes. We mostly had straight and A-line Kurtas in hand-block printed Indigoes, Kalamkaris and some soft pastel hues. We also had some goodies designed in sensuous rustling rayon. There were round necks and mandarin collars. We were totally overwhelmed by the response we got! These were instant sell-outs!  Thanks to all the lovely people ❤
IMG_6610.JPG

So the designing process at Jaipuriya begins with the selection of the designs we want to get printed. Yeah! We get our own fabric printed, fun, ain’t it! But then that’s the fun of belonging to Jaipur. One knows every nook and cranny (well almost!).


And then the sampling and designing happens.  Pamposh Sarolia, our Creative Head  (Ma, to me) has a deep aesthetic sense and an inherent sense of style, backed with ten solid years of running a leather and apparel studio of her own. I pulled her out of work hibernation and she designs all the traditional wear. The Indo-Westerns are mostly designed by yours truly.

What can be better than the fact that work is fun and takes you to beautiful hidden alleys to gorgeous treasures? I have to say I love my work!


Til ki Barfi- Makar Sakranti Special

Til ki Barfi  .jpg
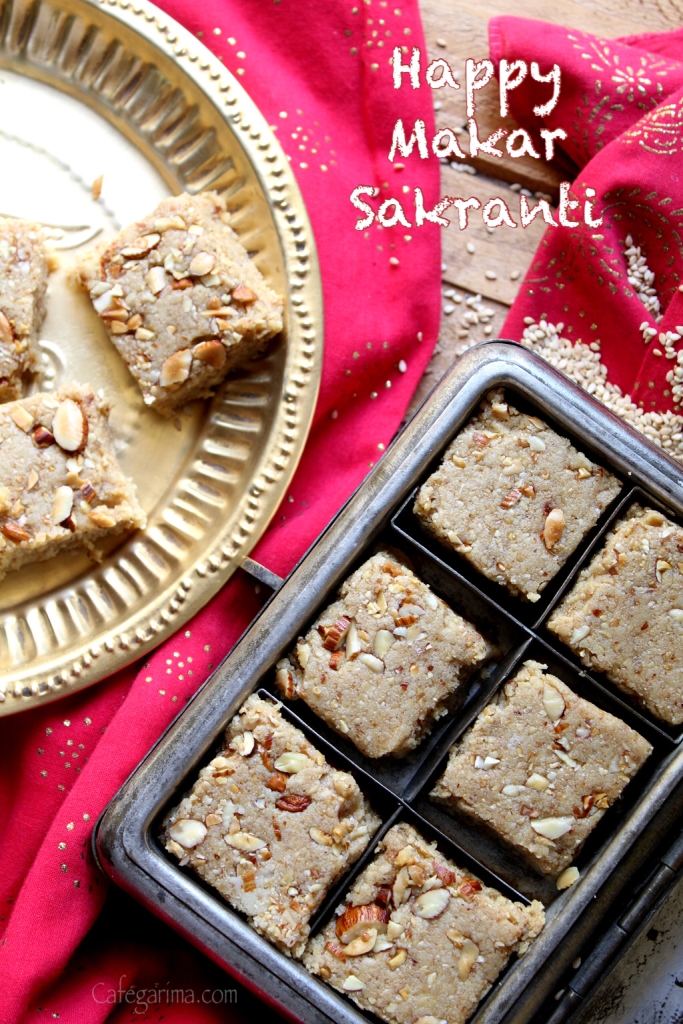
Celebrate Makar Sakranti with these Til ki Barfi, which are real easy to make and so well suited to the occasion. They just need khoya,sesame seeds (til) and sugar. That’s it! Some stirring together and done 😀 Could it get any easier!

You need
600 grams khoya ( I made mine at home. Find the recipe here)
200 grams white til/ sesame seeds
120 grams powdered sugar
A handful of roasted almonds to garnish, chopped coarse

Dry roast the til for 3-4 minutes till it begins to change colour. Do not over-roast or burn else it will become bitter. Cool and grind coarse in the mixer.


In a heavy bottomed pan roast the khoya for 4-5 minutes. Add the til and sugar and mix over medium heat till the sugar is melted and the mixture comes together. This takes another 4-5 minutes.
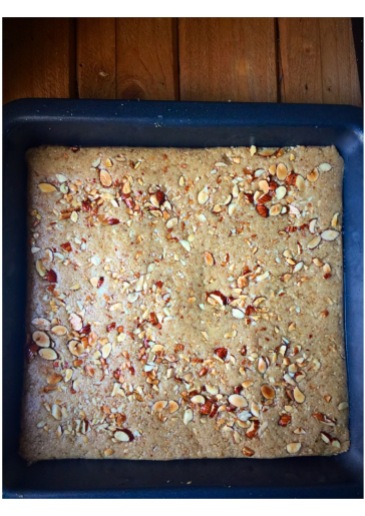
Spread the mixture in a thaali or square baking dish. Even out the surface with a spatula. Spread the chopped almonds and press them gently into the barfi with  the spatula. Even out the surface again. Let set for two hours and cut into pieces of desired shape and size.
Til ki Barfi stays good for up to two weeks.

Happy Makar Sakranti!

Love
Garima
Tik Mawa ki barfi .jpg

Make Khoya/Maawa at home

OBQN4897.jpg
Make khoya/maawa at home in fifteen minutes with three simple ingredients.  And it comes out so yum that I always fear half of it will vanish before making it to the Mithai 😛

This recipe yields about 600 grams of maawa
(Recipe adapted from here)
2 cups of milk powder
1 ¼  cup cream ( I used Malai)
3 Tbsp butter ( I used Amul)

In a heavy bottomed non-stick pan melt the butter and add the cream. Stir over low heat till the mixture beings to bubble gently. Add the milk powder in five lots stirring after each addition to avoid clumping. Cook stirring over medium heat till the maawa comes together. The whole process takes fifteen minutes. The maawa is ready to be used in barfi at this stage.
To make gulab jamuns cook the maawa further till it thickens a little more.
Maawa can be stored in the refrigerator for up to 5 days.


Restaurant-style Cream of Tomato Soup

Restaurant Style Tomato Soup .jpg
Winter and soups go hand in hand. My favourite is a bowl of thick tomato soup. And this recipe gives restaurant-style Cream of Tomato in three simple steps, with no butter or oil. It gets all its flavour from a little cream. I mostly scoop some fresh ‘malai’ off milk, whisk and use it.

This recipe makes four generous servings (I froze some of the leftover and it kept very well. I can now just heat and enjoy home-made soup any time!)

1 kilo/ 15 medium sized very red salad tomatoes (they should not be the sour variety)
250 grams/ 3 large onions
1 tsp salt
½ tsp ground pepper
1 tsp sugar
3-4 cups of water as needed to cook the soup
¼ cup cream or fresh malai and some more to garnish
Some finely chopped fresh coriander or parsley to garnish

Chop the tomatoes and onions into large cubes in a large pressure cooker or lidded pan, add salt, pepper, sugar and 2 cups of water. Bring the cooker to a whistle and turn off. Let cool and open the lid. If using a pan, let cook covered for 12-15 minutes.

Strain and save the liquid in a heavy bottomed pan. Puree the tomato and onion mix leftover and strain again. You get a thick, creamy tomato soup.

Add a cup of water to it (or more as per the consistency desired), check the seasonings and adjust them. Bring the mixture to a gentle boil over medium heat. Add ¼ cup of cream and finely chopped fresh coriander and mix well.


Serve hot garnished with more cream and coriander and bread croutons. I toast mine very crisp instead of frying. This makes for a very healthy, delicious and fulfilling meal.
Happy Winters!

Love
Garima
Cream of Toamto Soup .JPG

Easy 3 Ingredient Gulab Jamun, Halwai Style

Easy Gulab Jamun Recipe .jpg
Happy 2016 you’ll ❤
And in the New Year, I reiterate what I always say- Mommies are the best! Mine knows of my madness to recreate restaurant style dishes at home and got me this Gulab Jamun recipe straight from a halwai (professional Indian sweet maker). The beauty of this recipe is its simplicity and the fact that it never fails you! No hard stone like balls, no uncooked centres and no crumbly dough, this is simple perfection. Love you Ma for giving me the recipe for this copper-hued, melt in the mouth goodness!

Gulab Jamuns are  sure to attend all Indian weddings and celebratory occassions and real easy to make at home.No gulab/rose in them, but called so because of their possible Persian origin where ‘gul-aab’ means rose water, which may have been used to flavour the sugar syrup.  Jamun, they say, refers to its  dark colour. It is a milk solid (khoya and paneer)  based fried round dumpling, getting  its dark red colour becasuse of the Khoya/mawa/milk fudge used to make it.

To get 20 medium Gulab Jamuns you need

500 grams of Khoya/Mawa ( I make my own khoya. Find my simple recipe here. Store bought khoya can be used instead)
125 grams maida/all purpose flour/plain flour
160 grams paneer/cottage cheese (the halwai’s instructions were to get paneer from 1 ½ kilos of whole milk. I got 162 grams of paneer. I always make paneer at home. Find the procedure here)
500 grams of desi ghee to fry the jamuns (yeah, Gulab Jamuns have to be fried in ghee, there is no other way. Any other way is blasphemy 😛 )

For the sugar syrup
Boil one litre of water with 750 grams of sugar till the sugar melts completely and the liquid reaches a rolling boil.
Add one teaspoon powdered ilaichi/cardamom and some crushed saffron strands if you like

For the Gulab Jamuns
Mix all the three ingredients very well till you have a smooth dough.
Roll out into balls. I use tablespoon measure to get equal sized balls. Fry on a medium flame till they reach a beautiful copper colour.
I use a heavy bottomed milk pan with a handle to fry the jamuns. This helps me stir them without having to touch them in the early part of frying. This way there is no risk of breaking them
Dip into sugar syrup for 30 minutes at least.

Serve hot or grab cold from the fridge, they are always yummy yum!
Make them this winter and impress 😀
Love
Garima

Easy Gulab Jamun .jpg


Christmas Fruit Cake, step by step recipe

Simple Christmas Cake
My first Christmas cake ever! And what a delight it is 😀
Thanks to my dear friends Aruna , who blogs at ãhãram and Freda, who blogs at Aromatic Essence, for inspiring me with their gorgeous bakes.

Here is my simple Christmas Fruit Cake with a fair amount of fruit and a hint of spice.
A simple step-by-step recipe!

250 grams/2 levelled cups of maida/ all purpose flour + 32 grams/ ¼ cup for coating the soaked and drained fruit
250 grams/ 1 cup softened salted butter (I used Amul)
200 grams brown sugar ( I weighed and powdered it)
4 large eggs ( they should weight around 250 grams)
1 ½ tsp Baking powder
½ tsp cinnamon and ½ tsp ginger powder *
350 grams of mixed fruit soaked in 200 ml freshly squeezed orange juice**
½ tsp vanilla extract

Soaking the fruit
A day before the baking day soak mixed fruit in 200 ml orange juice. I used equal amounts of golden raisins, black currants, dried cranberry, glace cherry, candied orange peel and  candied fruit ( or tutti frutti), Add 2 tsp of rum to add a boozy hint. Two hours before baking drain the fruit well, saving the drained liquid to be used for brushing the cake later.
Add ¼ cup of maida to the drained fruit and mix so that the flour coats the fruit. This will ensure that the fruit does not sink to the bottom while baking.


Preparing the tin
Use an 8 or 9 inch round baking tin with high sides, preferably a springform pan.Line it with parchment. Alternatively use a heavy non-stick cake or bundt pan and grease it well. I used a heavy non-stick bundtlette pan and didn’t need to do any of this 😛

Baking the cake
Pre-heat the oven at 150C.
Sift together 250 grams of flour, baking powder, cinnamon and ginger powder.
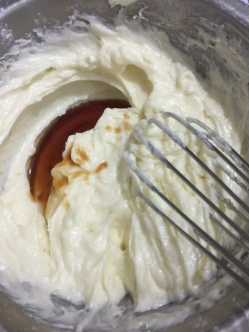
In a large pan, whisk the butter. Add the powdered brown sugar and whisk till creamy. Add the eggs one by one and mix after each addition. Whisk in the vanilla.
Add the flour and mix with the spatula. It will be a thick batter.
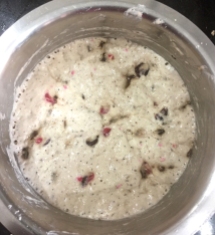
Stir in the flour-coated fruit. Incorporate to mix evenly.
Transfer to pan and even out the batter with the spatula. Bake for  45- 60 minutes. About 35 minutes into the baking time cover the cake with aluminium foil to prevent over browning. Let cool completely in the pan and remove.
Brush with the leftover juice and serve.
To store, wrap in cling film and store in an airtight box.

* Spices may be skipped if you dislike the taste
** Can used un-soaked fruits if you forgot to soak. Toss them in flour and add. Do not use black currants if using un-soaked fruit. Use raisins, cranberry, glace cherry, candied fruit and tutti frutti

Christmas Fruit Cake.jpg

Fruit and Nut Holiday Cookies

Cookies!! A lot of them are being baked in my kitchen these days. It is December and the weather is nice and nippy and Christmas is almost here. No wonder cookies are calling!
Pistachio Cranberry Cherry Roll-out Cookies.jpg
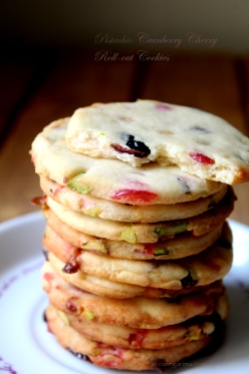
This is my favourite shortbread cookie dough and I throw in different fruit and nuts to get a variety on the cookie platter. And trust me when I say each variation tastes different

Here is the basic dough recipe (yeah, it is the same I baked the much-loved Hyderabad Karachi style fruit cookies with!) This makes a big batch. It can be halved.
(Makes 45 thick cookies)
450 grams (about 3 ½ cups) Maida/all purpose flour
330 grams (3 cups)  butter, softened at room temperature
150 grams ( 1 ½ cup) of granulated sugar, measured out and powdered in the mixer
1 ½  cups of candied fruit/ chopped nuts/ chocolate chips. I divided the dough into 3 parts and added different things to all.
1 ½ tsp rose extract or any other like vanilla, almond or pistachio. Rose works best.
1 tsp cardamom powder

Beat the sugar and butter with a hand whisk till it is creamy. This takes 2-3 minutes by hand.
Add the rose extract and the fruit and nut mixture.
I split into three and added
-Slivered cashews and almonds to the first lot
-Pistachios, dried cherries and cranberries to the second and
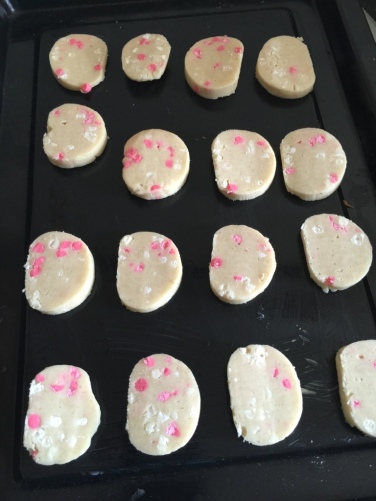
-White and Strawberry chocolate chip cookies to the third
Add the flour and bring the dough together with your fingers. The dough will be crumbly.


Divide the dough into three and make logs and cling wrap them and put in the refrigerator for an hour at least. The dough can be kept in the refrigerator for two days.

Alternatively shape into discs and cling wrap. Chill for 30 minutes and then roll about ½ inch thick and cut cookies.

Preheat the oven at 175C and bake on a parchment paper lined cookie sheet for 10-12 minutes till the cookies start to change colour around the edges. Bake a little less if you want them crumbly. Cool on the cookie sheet for five minutes and then move to a wire rack to cool completely.
Once cooled completely, store the cookies in air tight containers. They stay good for up to a fortnight, if they last that long, that is!

White Chocolate and Strawberry Chip Cookies.jpg

Cashew Almond Bit Crunchy Cookies.jpg

Jim Lahey’s Chocolate Bread

Chocolate Cherry Cranberry Bread.jpg
This is a no-recipe kind of post, really, another no-knead bread! This time right in the spirit of the festive season with chocolate, cranberry, cherry and walnuts. This is my version of Jim Lahey’s Chocolate Coconut bread. We aren’t big coconut fans here, so I skipped it and threw in some fruit and nut, which we are huge fans of!
Throw in everything, proof and bake- ta daa!! Slice and chomp away 😀
Jim Laheys Chocolate bread .JPG

280 grams (2 cups+ 2Tbsp) Maida/APF
150 grams (1 cup) chocolate, chopped into chunks [Use milk or dark. I used half dark and half milk]
60 grams of cranberries and cherries (optional)
A handful of coarsely chopped walnuts (optional)
¾ tsp salt
¼ tsp instant yeast
270 grams (1cup+3 Tbsp) water, at room temperature

In a large bowl, mix all the ingredients listed with a wooden spoon or your hand, and leave covered till it is more than doubled up and had bubbles over the surface. It may take anything from 5-24 hours depending on the temperature and humidity.

Gently drop the dough on a flour dusted surface. Be careful not to tear the dough. With lightly floured hands and a plastic scraper, shape the dough into a round ball or two loaves.  Lahey bakes it in a Dutch oven (DO) but I have tried baking both in a DO as well as a loaf tin, and it comes out perfect in either.


To bake in a loaf tin:
Transfer  the shaped loaves into two greased  9×5 greased loaf tins. Cover and leave to rise till doubled. To check if the bread is proofed, gently stick a floured finger in the loaf. If the impression stays, the dough is done, else let it rise for another 15-20 minutes.
Bake in a pre-heated oven at 200 degrees for 35-40 minutes. The bottom when tapped should sound hollow.
To bake in a Dutch Oven:
Take a large  cotton or muslin napkin and  generously dust it with flour. Gently place the dough on the napkin with the seam side down. Cover and leave to rise till doubled. To check if the bread is proofed, gently stick a floured finger in the loaf. If the impression stays, the dough is done, else let it rise for another 15-20 minutes.
Chocolate Cherry Cranberry Bread5.JPG
Half an hour before the end of the second rise, place the DO in the oven on the middle rack preheat the oven to 250C for 30 minutes. Remove the DO from the oven and gently invert the dough into the pot. Cover and bake for 30 minutes. Remove the lid and lower the temperature to 230C. Bake for another 15-20 minutes.
Cool and slice.

Every time I have baked and served this bread, it has got immense love! Go try it 😀
Have a lovely December!

Love
Garima


Lauki Corn Pulao

‘Lauki Corn Pulao! Well what’s that? Ye bhi koi banata hai Kya’ wailed my 14-year old (grumpy faced 😡) [who ever makes that!!!]
Well, it’s what you make when you are having a lazy Sunday, recovering from flu and throw everything that you have in the fridge into the Pressure Cooker. A lazy one pot meal.
The anti climax – the whole cooker is wiped clean in about 10 minutes!
Who’s having the last laugh now 😂

image.jpeg

It isn’t much of a recipe really.
A simple pulao. Soak  a cup of Basmati rice.
Heat 2 tbsp oil, throw in a tsp of cumin/jeera, some chopped garlic and onion. Brown them. Chop in a large tomato. Add salt, red chilli powder,  Turmeric/ Haldi coriander/dhaniya powder, cook, throw in veggies of choice, rice, a cup of water, one whistle
Done!

It’s tough to wipe the smirk off me now! 😄